How to Design and Build A Forest Garden - Part 1. Surveying
How to Design and Build A Forest Garden - Part 1. Surveying - Hallo sahabat How to Plant Vegetable, Pada Artikel yang anda baca kali ini dengan judul How to Design and Build A Forest Garden - Part 1. Surveying , kami telah mempersiapkan artikel ini dengan baik untuk anda baca dan ambil informasi didalamnya. mudah-mudahan isi postingan yang kami tulis ini dapat anda pahami. baiklah, selamat membaca.
Judul : How to Design and Build A Forest Garden - Part 1. Surveying
link : How to Design and Build A Forest Garden - Part 1. Surveying
We had an amazing group join us for our first course and managed to complete the design and build of a 100 m2 forest garden consisting of around 120 plants representing 22 species (not including the local plants).
Forest Gardens are an excellent way to produce food and other resources for humans while enhancing biodiversity by providing a range of habitat for wildlife within the design. They are very enjoyable to design, build and interact with. Creating a forest garden is an intellectual pursuit as well as a physical one. It’s like a living, 3D, amorphous puzzle that you can eat : )
We have another Design n' Build A Forest Garden Course April 25th -28th - 2019 coming up in the Spring but if you can't make it to the course to experience for yourself the creation of this new garden, you can use this post as a guide to get going wherever you may be.
I'm also planning to run a live interactive session hosted on Zoom to discuss in more depth and answer any questions related to the design and implementation of this garden.
The session will be around 2 hours long and will include :
If you would like to take part please preregister by entering your name, email and timezone below and we'll get back to you once we have a fixed date. If you cannot access the form below for some reason you can find it here.
We’re super excited to start what we hope will become a regular activity to engage more people around the world.
So back to the original post - here is how we designed and built a forest garden.
Climate: Temperate
Köppen Climate Classification - Dfc borderline Cfb
USDA Hardiness Zone: 5b - 7a
Latitude: 42°
Elevation: 574 m
Average Annual Rainfall: 588.5 mm
A great starting point for any land based design is surveying the plot and surrounding area. On the first day of the course following a brief introduction we got straight to work with the climate surveys. This work that can be largely achieved with a PC and the internet.
We start with the climate survey that helps to define the boundaries of our options. The kind of information we are looking for here is as follows:


 You can find the above information with the charts at www.meteoblue.com

Here's a list of some of the existing plant species from this site.
In all of the perennial polycultures I design, my intention is to retain all of the existing species and to add more edible/productive plants along with fertility/support plants to assist them. More often than not many of the plants already growing on your site will be edible, medicinal, attractive to wildlife and fascinating organisms that are well worth getting to know.
Next we made a simple but effective soil survey to gauge the quality of the soil we are working with.

The soil test covers the below:
1.GROUND COVER - What is covering the surface of the soil
2.PENETROMETER - How easy is it to penetrate the soil
3.INFILTRATION - How quickly the soil drains water
4. DIVERSITY OF MACROLIFE - Quantity of visible soil organisms present on the surface
5. ROOT DEVELOPMENT - How the plant roots are distributed throughout the soil profile
6. SOIL STRUCTURE - How the solid parts of soil and the pore space between them are arranged
7. AGGREGATE STABILITY - How stable is the structural arrangement
8. EARTHWORMS - How many
9. LAB ANALYSIS - pH - the mineral content of your soil
Apart from Lab Analysis, all of the tests can be carried out with materials you will likely have around you. This soil test, when repeated each year, is a great way to track the progress of your soil overtime and to see how your methods are increasing or decreasing the health of your soil. The tests were developed by Northern Rivers and you can find full instructions and more info here.
After lunch we were back on site for the cadastral survey, to mark the perimeter of the design area and to make a topography survey in order to gain an understanding of the shape of the ground i.e where it slopes, high points and low points etc.
Cadastral - In this case the boundary for the garden was defined by existing features of the site, i.e, a hedgerow to the west, a main access path to the east, the property boundary to the south and an overflow swale for the main pond to the north. When marking the boundaries of the design we made sure to include a 1 m wide pathway around the entire area.

The corners of the plot were staked and we measured the distance between each corner with a measuring wheel taking note of each distance between each point in order to recreate the design on software later. You can also do this with a very accurate GPS (RTK based) and an orthophoto (an aerial photograph or image geometrically corrected such that the scale is uniform and corresponds to the GPS data).
A standard smart phone GPS and google earth do not provide anything of practical use at this scale. For a multi hectare plot they are adequate to gain a general impression.

Topography Survey - Next we embarked upon the topography survey
We found we have a mild slope from the North to the South and towards the East. Given that we have an irrigation channel to the west of the garden this meant that we could arrange irrigation channels and planting patterns to take advantage of gravity to irrigate all of the plants on the site.
The irrigation channel design we choose determined the layout of our access which in turn provided us with a number of subdivisions within the plot.

That's all for this post, and in How to Design and Build A Forest Garden - Part 2 - Creating, we will look at how we selected plants for the design, the rationale behind our plant placement , how we prepared the site for the work to begin, how we established the irrigation channels, pathways and planting zones for the plants, our planting out techniques and how to manage the garden.
If you enjoyed this post please leave us a comment and a like and even better share it with your friends on social media. The more our articles are shared the more likely they are to appear in search engines and the further we can reach people with our message and grow our project.
Anda sekarang membaca artikel How to Design and Build A Forest Garden - Part 1. Surveying dengan alamat link https://howtoplanvegetable.blogspot.com/2019/02/how-to-design-and-build-forest-garden.html
Judul : How to Design and Build A Forest Garden - Part 1. Surveying
link : How to Design and Build A Forest Garden - Part 1. Surveying
How to Design and Build A Forest Garden - Part 1. Surveying
Last Autumn we tried out a new course format, the "Design 'n Build", an intensive practical course where we go through the whole design process and complete the build of a project within 3 days.We had an amazing group join us for our first course and managed to complete the design and build of a 100 m2 forest garden consisting of around 120 plants representing 22 species (not including the local plants).
Forest Gardens are an excellent way to produce food and other resources for humans while enhancing biodiversity by providing a range of habitat for wildlife within the design. They are very enjoyable to design, build and interact with. Creating a forest garden is an intellectual pursuit as well as a physical one. It’s like a living, 3D, amorphous puzzle that you can eat : )
 |
| Produce and Residents from Our Forest Gardens |
We have another Design n' Build A Forest Garden Course April 25th -28th - 2019 coming up in the Spring but if you can't make it to the course to experience for yourself the creation of this new garden, you can use this post as a guide to get going wherever you may be.
The design for the garden we built in Autumn 2018
 |
| The Forest Garden, depicting the garden when initially planted and when mature |
I'm also planning to run a live interactive session hosted on Zoom to discuss in more depth and answer any questions related to the design and implementation of this garden.
The session will be around 2 hours long and will include :
- Overview of the Design - Design Goals and Objectives
- Starting Point - How we approached the design of this landscape
- Rationale - Why we laid out access, water, drainage, and planting locations where we did
- Species Selection - How and why we selected the various species
- Technical Discussion - Software and tools we used
- Closing Questions and Answers
- Access to design spreadsheets and databases including a number of unique species lists.
If you would like to take part please preregister by entering your name, email and timezone below and we'll get back to you once we have a fixed date. If you cannot access the form below for some reason you can find it here.
We’re super excited to start what we hope will become a regular activity to engage more people around the world.
So back to the original post - here is how we designed and built a forest garden.
 |
| Photos from the Design n' Build A Forest Garden Course in Autumn 2018 |
The Site Specs
Köppen Climate Classification - Dfc borderline Cfb
USDA Hardiness Zone: 5b - 7a
Latitude: 42°
Elevation: 574 m
Average Annual Rainfall: 588.5 mm
 |
| Ataraxia - Forest Garden - before and after |
Climate Survey
We start with the climate survey that helps to define the boundaries of our options. The kind of information we are looking for here is as follows:
Mean temperatures and the average amount of rain your site receives each year and in what months that rain is received. It's very useful to have the extreme records for this info too, i.e, what is the most amount of rainfall recorded in any one event in any one month and what were the hottest and coldest days recorded.

How much light your site receives throughout the year and how that light is distributed on the ground (which objects create shade)

If relevant, how many days of snow cover will you receive

Temperature patterns of your site. The lowest and highest recorded temperatures are very important to know, as are the dates of your first and last frosts

The wind patterns of your site, from which direction does the wind blow and how intense is that wind?
Botanical Survey
We then moved onto the site to take a look at the botany, taking note of the vegetation, specifically the layers that are already growing on the site. Obviously we did not have time to record all of the plants (best achieved by surveying in each season) but we have been making these records for the last few years. We looked at a few indicator species and methods to categorise and record plants.
Making a botanical survey is a great way to really get to know your site and of course, the resident plants.
 |
| Some of the amazing polyculture that already exists on the site (photos from spring- summer) |
Here's a list of some of the existing plant species from this site.
In all of the perennial polycultures I design, my intention is to retain all of the existing species and to add more edible/productive plants along with fertility/support plants to assist them. More often than not many of the plants already growing on your site will be edible, medicinal, attractive to wildlife and fascinating organisms that are well worth getting to know.
Soil Survey

The soil test covers the below:
1.GROUND COVER - What is covering the surface of the soil
2.PENETROMETER - How easy is it to penetrate the soil
3.INFILTRATION - How quickly the soil drains water
4. DIVERSITY OF MACROLIFE - Quantity of visible soil organisms present on the surface
5. ROOT DEVELOPMENT - How the plant roots are distributed throughout the soil profile
6. SOIL STRUCTURE - How the solid parts of soil and the pore space between them are arranged
7. AGGREGATE STABILITY - How stable is the structural arrangement
8. EARTHWORMS - How many
9. LAB ANALYSIS - pH - the mineral content of your soil
 |
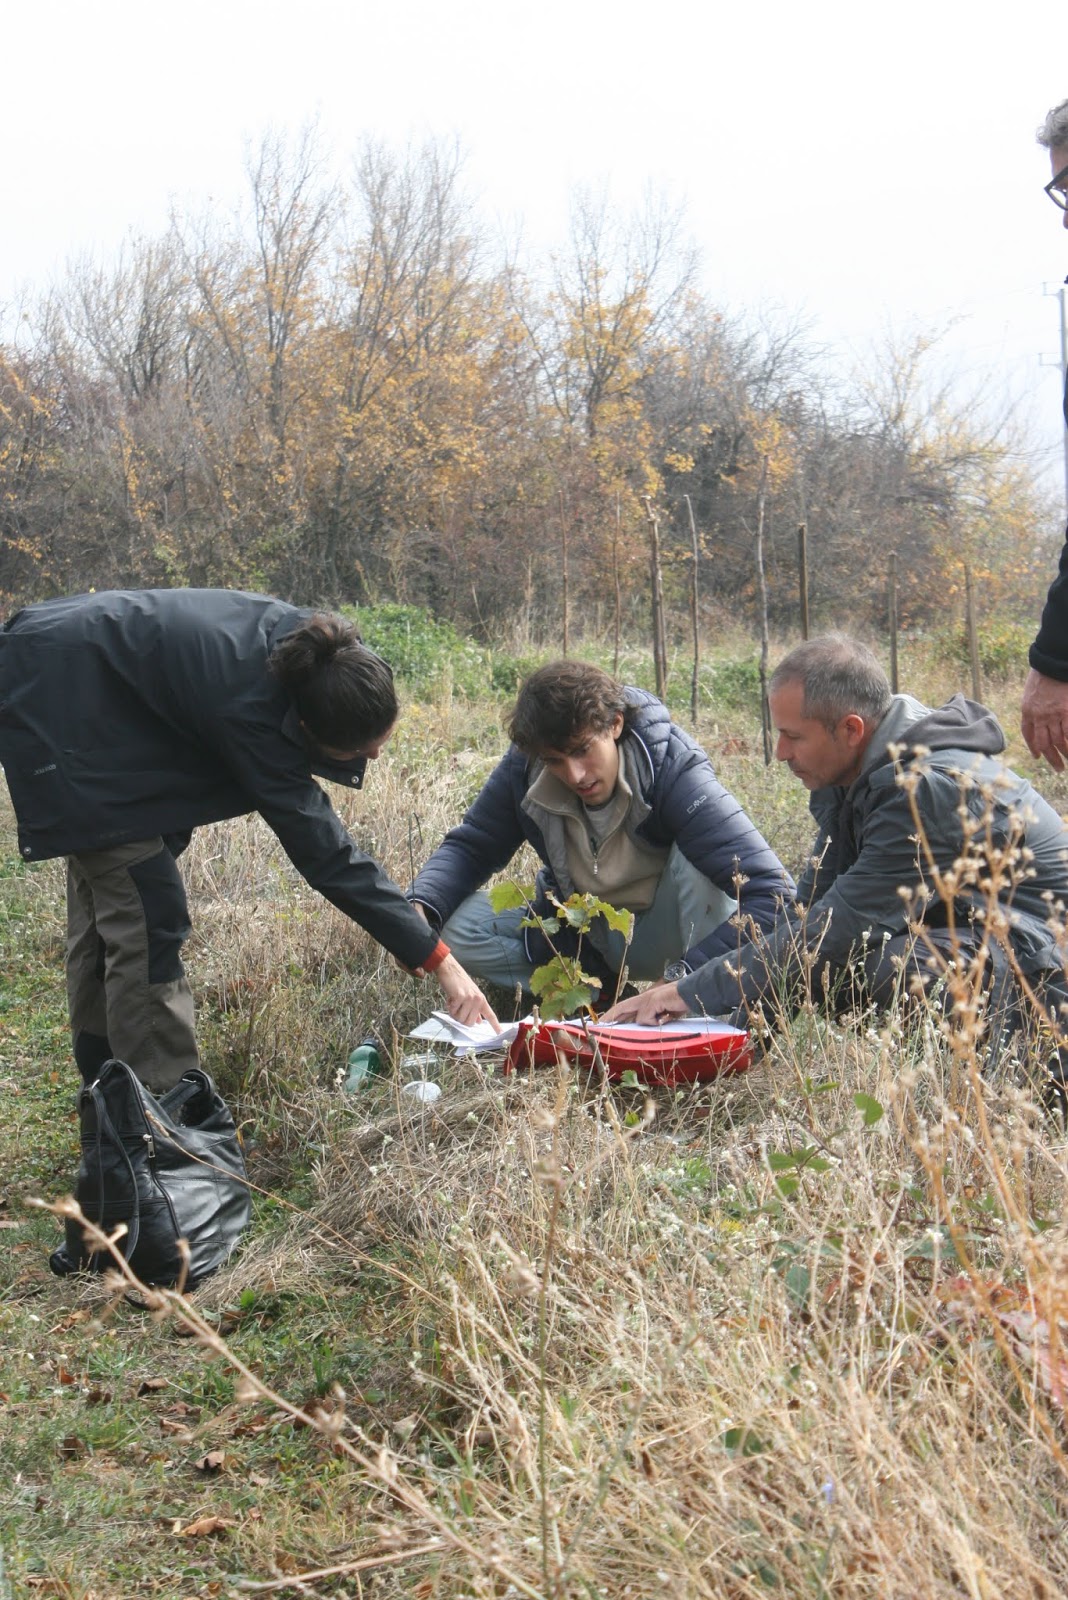
| Katrin, Andreas and Frances Making the soil test. |
Apart from Lab Analysis, all of the tests can be carried out with materials you will likely have around you. This soil test, when repeated each year, is a great way to track the progress of your soil overtime and to see how your methods are increasing or decreasing the health of your soil. The tests were developed by Northern Rivers and you can find full instructions and more info here.
Cadastral and Topography Survey
After lunch we were back on site for the cadastral survey, to mark the perimeter of the design area and to make a topography survey in order to gain an understanding of the shape of the ground i.e where it slopes, high points and low points etc.
Cadastral - In this case the boundary for the garden was defined by existing features of the site, i.e, a hedgerow to the west, a main access path to the east, the property boundary to the south and an overflow swale for the main pond to the north. When marking the boundaries of the design we made sure to include a 1 m wide pathway around the entire area.

The corners of the plot were staked and we measured the distance between each corner with a measuring wheel taking note of each distance between each point in order to recreate the design on software later. You can also do this with a very accurate GPS (RTK based) and an orthophoto (an aerial photograph or image geometrically corrected such that the scale is uniform and corresponds to the GPS data).
A standard smart phone GPS and google earth do not provide anything of practical use at this scale. For a multi hectare plot they are adequate to gain a general impression.

Topography Survey - Next we embarked upon the topography survey
 |
| Using a transit level we established the contour lines on the site and measured elevation distance from the highest to the lowest point of the site. |
We found we have a mild slope from the North to the South and towards the East. Given that we have an irrigation channel to the west of the garden this meant that we could arrange irrigation channels and planting patterns to take advantage of gravity to irrigate all of the plants on the site.
The irrigation channel design we choose determined the layout of our access which in turn provided us with a number of subdivisions within the plot.

That's all for this post, and in How to Design and Build A Forest Garden - Part 2 - Creating, we will look at how we selected plants for the design, the rationale behind our plant placement , how we prepared the site for the work to begin, how we established the irrigation channels, pathways and planting zones for the plants, our planting out techniques and how to manage the garden.
If you enjoyed this post please leave us a comment and a like and even better share it with your friends on social media. The more our articles are shared the more likely they are to appear in search engines and the further we can reach people with our message and grow our project.
Registration for our April course is now open with 15% discount on accommodation and food fees when you register as a group (2 or more).


We offer a diversity of plants and seeds for permaculture and forest gardens including a range of fruit and nut cultivars. We Deliver all over Europe from Nov - March.
Give a happy plant a happy home :)
Give a happy plant a happy home :)
 |
| The Bionursery |
 |
If you appreciate the work we are doing you can show your support in several ways.
|
Demikianlah Artikel How to Design and Build A Forest Garden - Part 1. Surveying
Sekianlah artikel How to Design and Build A Forest Garden - Part 1. Surveying kali ini, mudah-mudahan bisa memberi manfaat untuk anda semua. baiklah, sampai jumpa di postingan artikel lainnya.
Anda sekarang membaca artikel How to Design and Build A Forest Garden - Part 1. Surveying dengan alamat link https://howtoplanvegetable.blogspot.com/2019/02/how-to-design-and-build-forest-garden.html
Belum ada Komentar untuk "How to Design and Build A Forest Garden - Part 1. Surveying "
Posting Komentar